
CherryStudio Configuration
Cherry Studio is an open-source AI desktop client that can connect to the models on the Token Switch platform by configuring.
1. Download and Install CherryStudio
Go to the Cherry Studio download page and proceed by yourself. download and install the package according to the operating system and complete the installation.
After opening the software, find the "Settings" button in the top-left corner and click to enter the settings page.

2. Add Provider
- After entering the settings page, add a provider

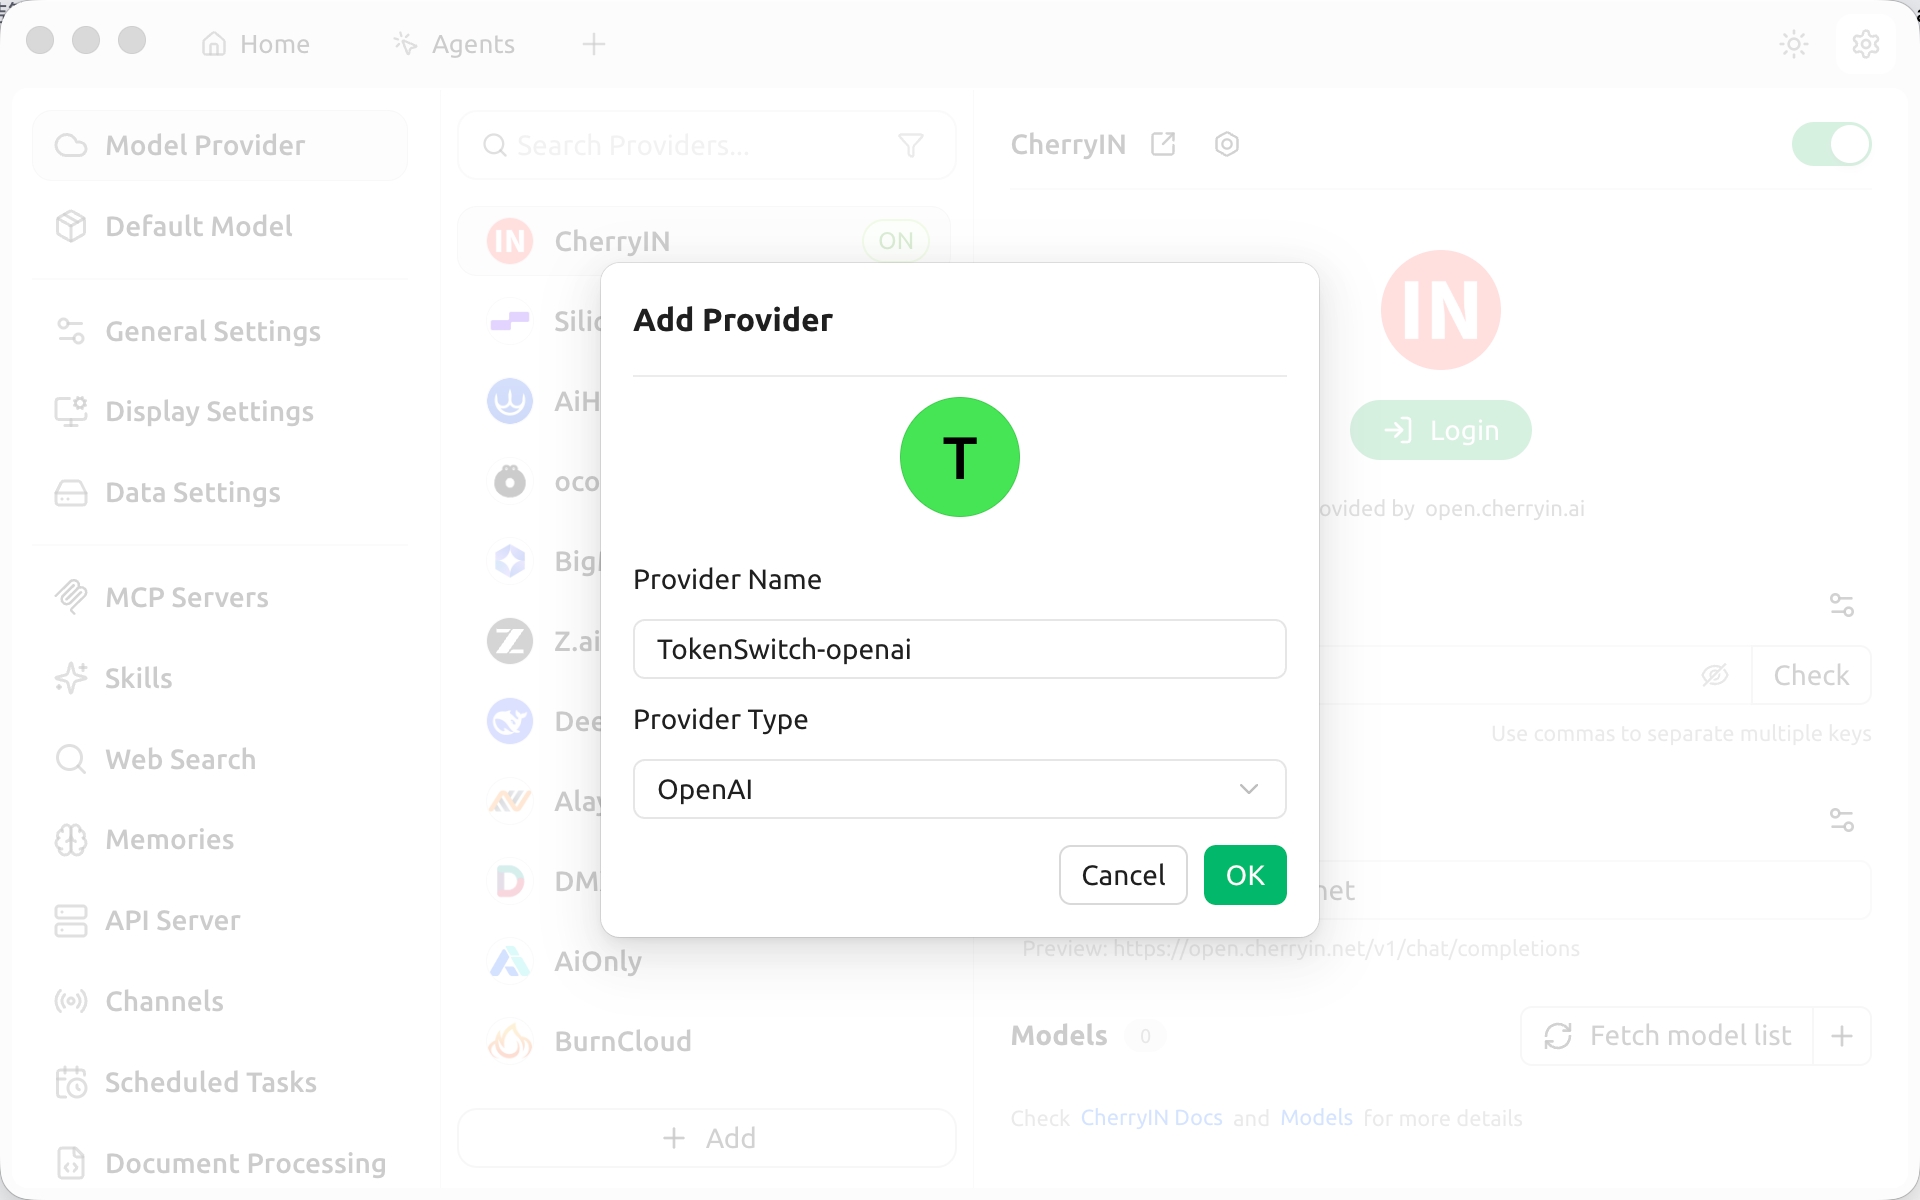
Fill in the information:
Provider Name: e.g., TokenSwitch-openai
Provider Type: Select the provider type for the model you need to use, e.g., OpenAI
- Click "Confirm"
After completion, you can see the provider has been added successfully.

3. Fill in API Information
Fill in the following for the newly added provider:
API Key: Enter the API key you obtained
API Address:
{{apiUrl}}4. Get Model ID
Go to the "Portal / Model Marketplace", search for the target model and click its model card, then click the Copy button next to the Model ID to copy it.
5. Add Model in CherryStudio
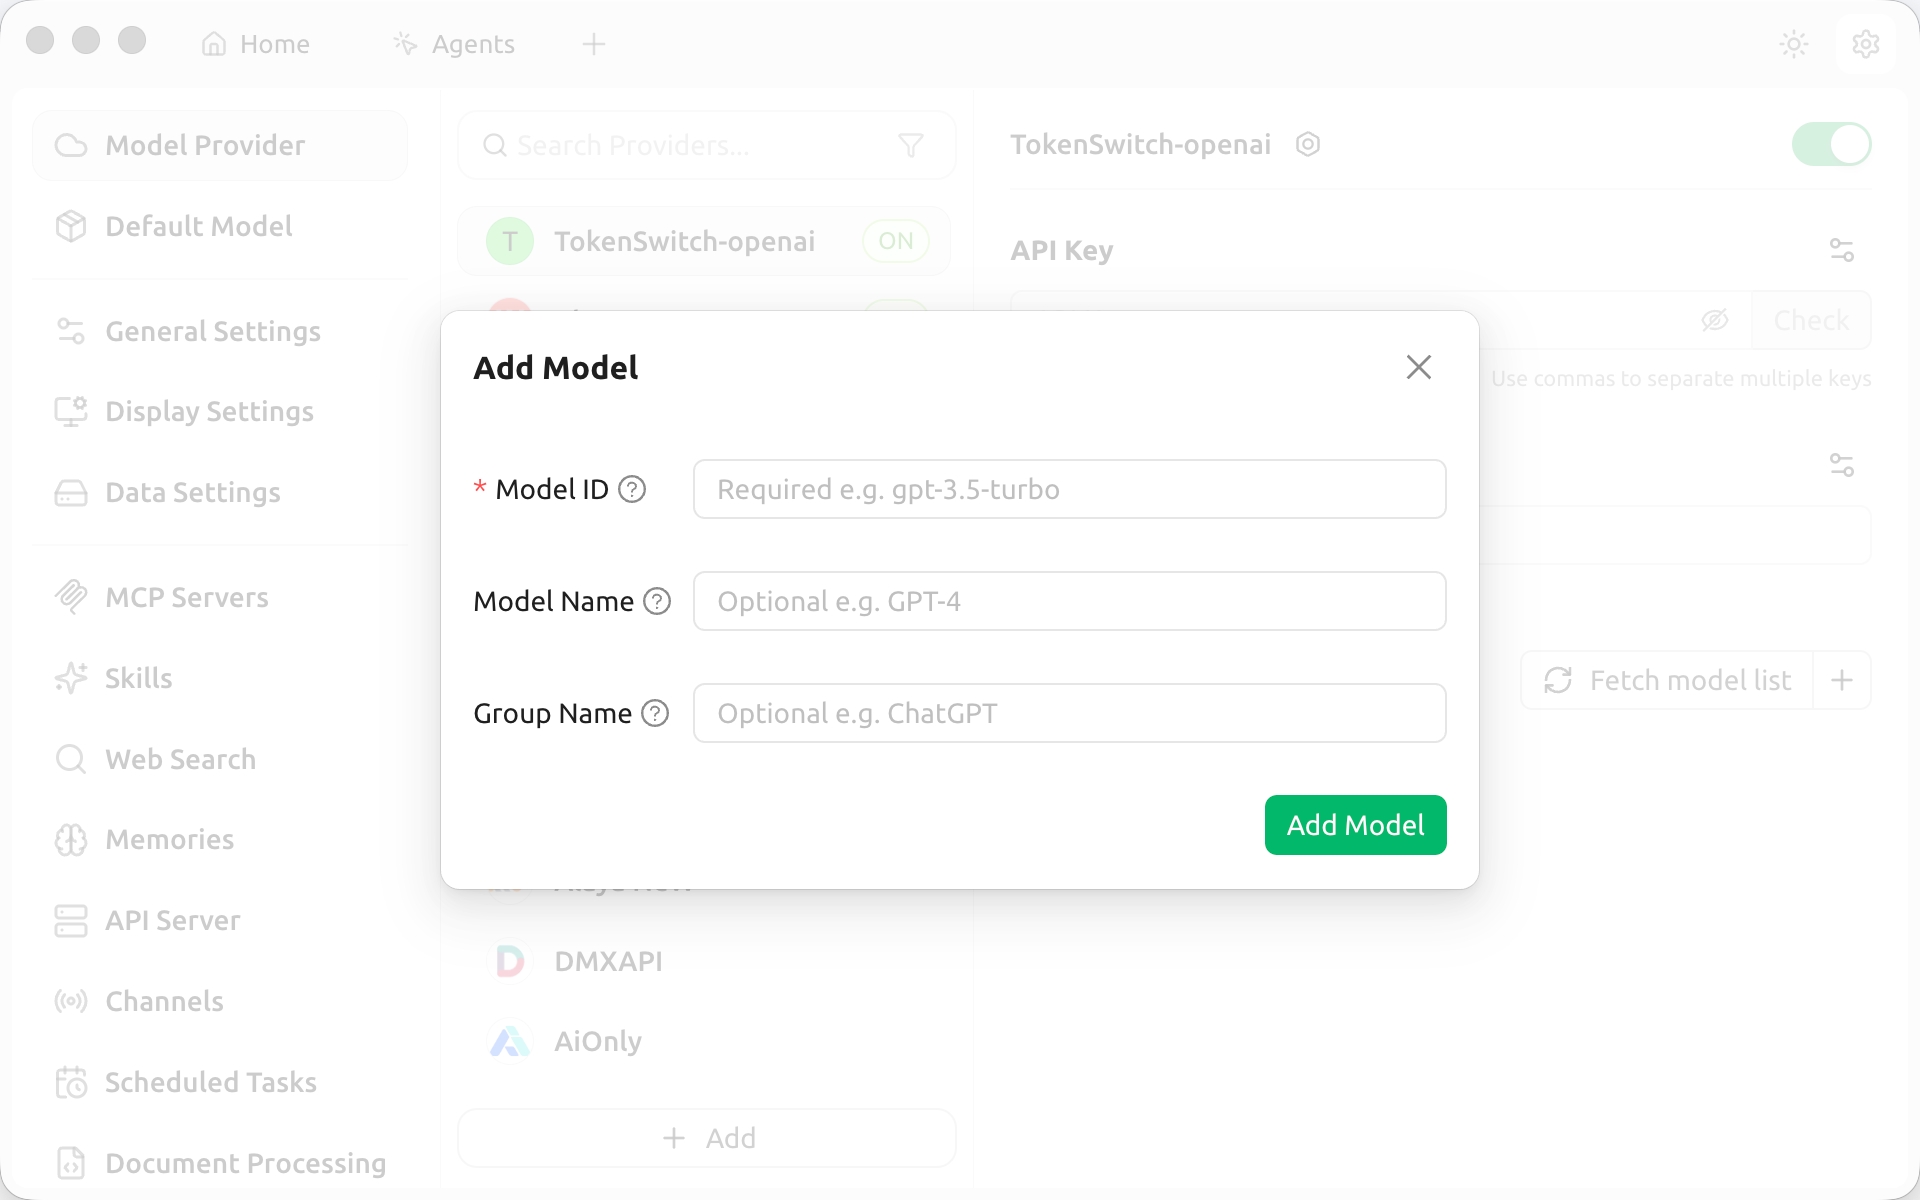
Return to the CherryStudio settings page
Click "Add Model"
Fill in the details:
Model ID: Paste the ID you just copied
Model Name: Custom
Group Name: Custom
Click "Add Model"
Once added successfully, you can start using it.
6. Start Conversation
Enter the CherryStudio conversation page, select the added model in "Topic", and start chatting.
7. Official Documentation
For more feature descriptions, please refer to: